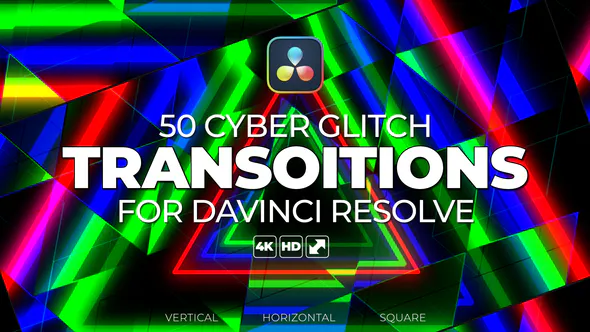
A glitch transition in DaVinci Resolve is a quick way to add energy to a cut, especially in gaming, tech and music videos. This post walks through a typical project, a fast-paced vertical edit for social media, and shows how we use our Cyber Glitch Transition pack for DaVinci Resolve to add glitch cuts that match the music, plus the general Resolve habits that make any transition look clean.
The project: a vertical gaming highlight reel
The brief: a 30-second vertical highlight reel for short-form social platforms, cut to a track with a strong beat. The clips are gameplay captures and a few face-cam shots. The edit needs to feel quick and digital, with a handful of punchy transitions on the biggest moments, without turning into a wall of effects.
Two constraints shaped the choice of transitions. The project is vertical, so the transitions have to work at 9:16, not just 16:9. And the edit will be re-cut for other platforms, so changing durations quickly matters.
Why use a glitch transition in DaVinci Resolve
Glitch transitions suit content that’s already digital: gameplay, tech reviews, app demos, electronic music. They hide a hard cut behind a short burst of distortion, so the viewer reads the change as intentional. Used sparingly, they also mark the moments that matter, such as a big play, a reveal or the drop in the music.
You can build glitch effects yourself in Resolve’s Fusion page, but for a cut-heavy edit it’s much faster to drag a finished transition onto the cut and move on.
Using the Cyber Glitch Transition pack
According to the product page, the Cyber Glitch Transition pack for DaVinci Resolve works at any resolution and frame rate, in horizontal and vertical formats, with colour settings and the option to change to any duration. It’s drag and drop, includes a video tutorial, and comes with links to free sound effects that suit it. No advanced Resolve skills are needed.
Step 1: Install and find the transitions
Follow the video tutorial included with the pack to install it. Once installed, look for the transitions in Resolve’s Effects library.
Step 2: Mark the moments
Before adding any transitions, play the edit and mark the beats where a glitch should land. Press M to add a marker while the timeline plays. For a 30-second reel, four to six glitch cuts is usually plenty. The rest of the cuts stay as hard cuts.
Step 3: Drag the transition onto the cut
Drag a transition from the Effects library onto the edit point between two clips. Because the pack works in vertical, it fits the 9:16 timeline without repositioning anything.
Step 4: Set colour and duration
Select the transition and open its settings. Set the colours to match the channel’s branding, then trim the duration so the burst lands on the beat. Short durations, around a few frames, feel snappy. Longer ones feel more like an effect than a cut.
Step 5: Add the sound
A glitch transition without sound often feels unfinished. Use the free sound effects linked with the pack and place one under each transition on an audio track, a frame or two before the visual cut so the sound leads slightly.
General tips for transitions in Resolve
These apply to any transition in DaVinci Resolve, built-in or third-party:
- Leave handles. A transition needs extra frames beyond the cut on both clips. If a clip ends exactly at the cut, Resolve can’t centre the transition and may warn about insufficient handles. Trim clips with some room to spare.
- Add a default transition quickly. Select an edit point and press Ctrl+T (Windows) or Cmd+T (macOS) to add the standard transition, then replace it if needed.
- Change duration on the timeline. Drag either edge of a transition to make it longer or shorter, or type a duration in the Inspector.
- Keep a consistent style. Use one family of transitions for a project so the edit feels designed rather than random.
Also editing in Premiere Pro?
If part of the team works in Premiere Pro, our Cyber Glitch Transitions for Premiere Pro give the same look, with horizontal, vertical and square formats, thumbnail previews inside Premiere and sound effects included. For titles in the same style, the 100+ Glitch Title MOGRTs pack covers Simple, Neon and RGB looks. Our post on the glitch text effect in After Effects shows how to build a matching title by hand.
What the glitch cuts add
In an edit like this, the glitch transitions do two jobs. They make the cuts on the beat feel deliberate, and they give the reel a consistent digital style that matches gameplay footage. Because the transitions are adjustable in duration and colour, the same set can be reused for the next reel with only small changes.
FAQ
Does the Cyber Glitch Transition pack work in vertical videos?
Yes. The product page lists horizontal and vertical support at any resolution and frame rate.
Can I change the length of the transition?
Yes. The product page says you can change it to any duration, and you can also drag the transition’s edges on the timeline.
Are sound effects included?
The DaVinci Resolve pack includes links to free sound effects that suit it. The Premiere Pro version includes sound effects in the pack.
Why does Resolve say there aren’t enough handles?
The clips don’t have extra frames beyond the cut. Trim the clips so there’s footage to spare on both sides of the edit point.
Studio list
Get new tools and free drops first
One email when a new plugin, template or free pack is out. No spam, unsubscribe any time.

